Juniper loves to help – in the garden, in the kitchen or wherever we happen to be. So when my Aunt T called me from a thrift store and said, “There’s an old cabinet here that could really make a cute play kitchen…” I just had to say yes. And so began a do-it-yourself Christmas present project. Here’s the recap of how I did it.
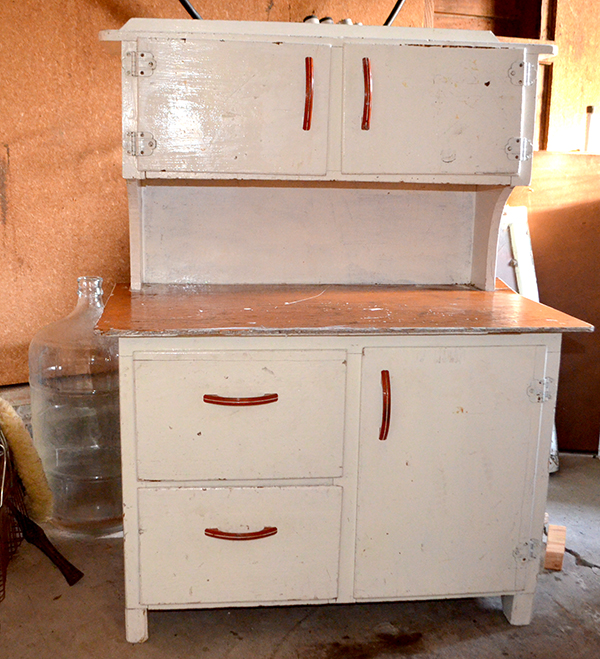
Old cabinet ready to become a play kitchen
Step 1: Find your future kitchen and prep
The cabinet we found has a low counter on it and looks like a miniature workbench. I’ve seen folks turn more challenging things like old TV cabinets, night stands, etc. into play kitchens. Get some ideas through web searches and on Pinterest. My cabinet find was so straight-forward that turning it into a kitchen was super simple.
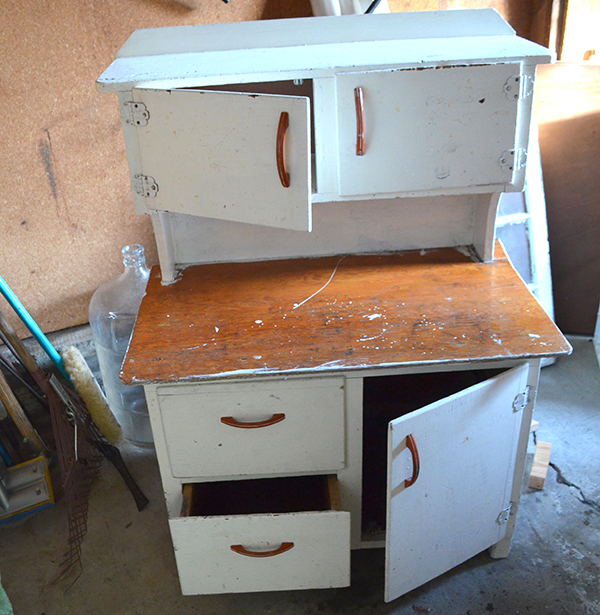
Old cabinet ready for painting
To prep the cabinet, I do a good thorough cleaning. Once dry, I remove all the drawers and knobs to paint everything white. That gave me a good blank slate to work from, so I could decide later what color and features to add.
Step 2: Place sink area
Our cabinet was wide enough to split into two areas: stove top and washing area. I carefully drew the placement of everything in pencil on the countertop before anything was cut. That helped me plan out how it could all fit. The sink and faucet were the first things to go in, since they required cutting into the cabinet.

13/16″ drill bit for making faucet holes. I brought the faucet into the hardware store to make sure I found a perfect match!
I bought a few items to help with this step: a cheap faucet (thrift store), metal bowl (thrift store) and a 13/16″ drill bit (hardware store) that perfectly matched the holes I would need for the faucet. Altogether, those supplies were ten bucks.
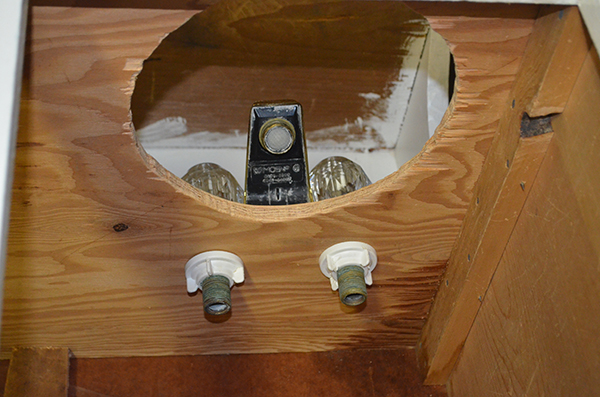
View from under the cabinet of sink hole and faucet assembly.
A jigsaw would likely work best for cutting the sink hole, but I don’t have one so I improvised with a narrow hand saw. I cut a crude hole for the metal bowl/sink and spent some time sanding to get the shape just right. After placing the sink, I used a clear caulking to keep it in place. The drill bit was just perfect for a snug-fitting faucet and I used the washers it came with to tighten into place.
Step 3: Create the stovetop
This part was a lot of fun! I used cheap plastic cabinet knobs to make on/off dials for the stove. I drilled tiny holes, placed the knobs, then tighten with washers on the other end. Leave them loose enough so your little one can still turn them. In a later picture, you’ll see I painted a tiny white dot on the edges.
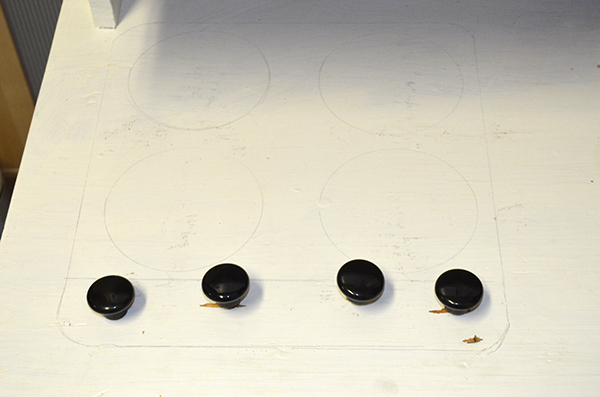
Pencil marking the location of all pieces. Drawer knobs used as on/off burner dials.
I made a few mistakes with creating the burners. First, paint the area BEFORE placing the knobs. I left mine loose so I could paint right under then and around them. The second mistake – I used whatever paint I had on hand, which was oil-based. Big mistake. After two days, the paint still wasn’t dry. I ended up wiping off what I could and repainting with acrylic. Acrylic has a wide array of colors and it dries in just an hour or two.
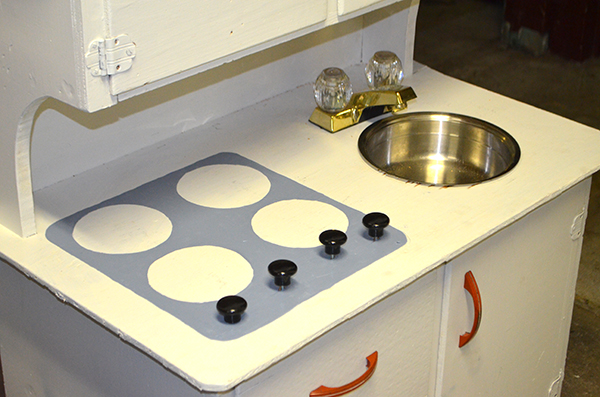
Painting the stovetop
I painted the stovetop grey and the burners black. Kind of simple colors, but I wanted the grey to mimmick the look of metal – like most stovetops.
Step 4: Transform the cabinets
This part can vary depending on what you have to work with. I’ve seen folks take out cabinet faces and add ruffled curtains. You could simply paint the cabinet faces and call it done. I choose to make an oven with a window and a refrigerator with a “glass” shelf inside, both painted grey. The last bottom cabinet I painted blue to add some color, but the two overhead cabinets I left white.

Bottom drawers become oven with window, fridge with “glass” shelf and a storage drawer for pots and pans
For the oven door, I cut a wide hole in one drawer face, about 1″ from the interior edges, so I wouldn’t compromise the drawer construction. I measured the opening, walked to my local hardware store, and they cut a piece of plexiglass to size – plus about 1/2″ on all sides. I used an all-purpose glue to adhere the plexiglass to the inside of the drawer “window”. That way you don’t see the glue from the outside and the oven door looks more realistic.
The refrigerator was an easy change. I removed a wooden shelf, took measurements and had my local hardware store cut another piece of plexiglass to size. It fit perfectly and looks just like the glass shelves we all have in our fridges. Total cost of both pieces of plexiglass was about six bucks.
Step 5: Accessorize
After all the major pieces were in place, I took a step back to evaluate my work. I felt like there was something missing, so I decided to add some little finishing touches. I used white hooks, about two bucks a package, to screw underneath the overheard cabinets. Those became the perfect place to hang cooking utensils.
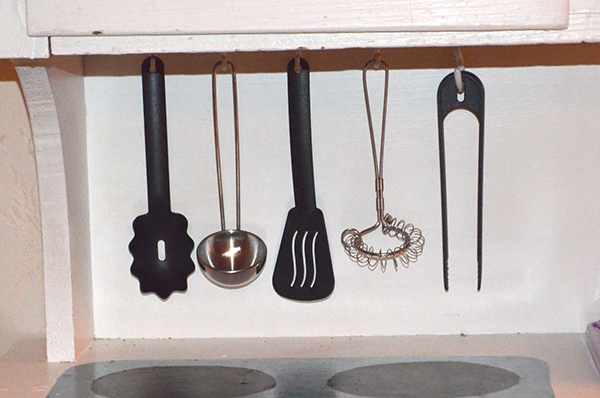
Cooking utensils hanging from small white hooks under the overhead cabinets
Next, I used a big white hook to screw onto the side of the cabinet, right under the countertop. I donated one of my vintage kitchen towels to the play kitchen cause. Juniper actually uses it a lot to wash the dishes and clean up her cooking area.
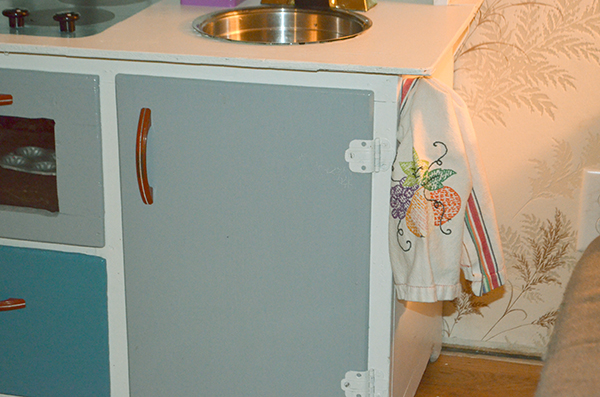
Vintage kitchen towel hanging from a large, white hook under the counter
Step 6: Play!
The final play kitchen turned out just like I wanted. It’s simple, but has all the elements you need for hours of fun. The cabinet cost $10, the construction components were about $15 and the kitchen toys (pots, pans, food) were about $20. In terms of time, I probably spent less than eight hours.

The finished play kitchen. (Don’t be fooled by the cat – he did nothing to help!)
Although this was a fun project, there were times when I thought I should have just bought a play kitchen off Craigslist! It’s hard as a working parent to make time for any extra projects. But seeing how much fun Juniper is having with this kitchen has made my hard work feel worth it.
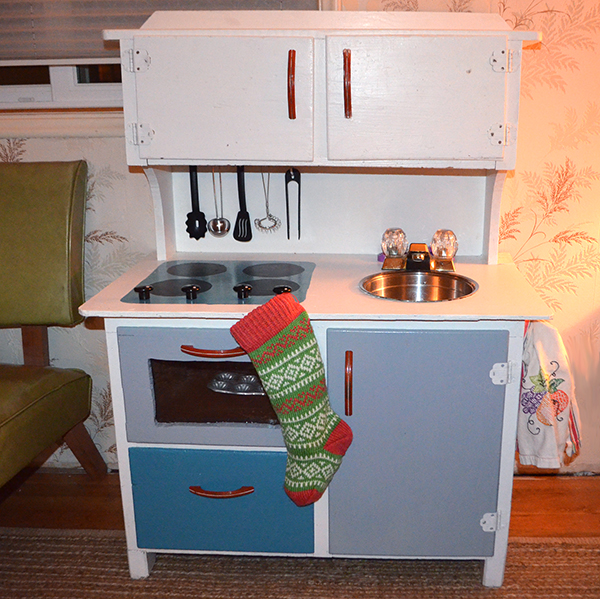
Juniper’s Christmas present
So if you come across that perfect piece of used furniture to turn into a play kitchen, don’t be intimidated! It’s an easy, fun project that can be as simple or complicated as you want it to be.I’ll never forget Juniper’s look of joyful surprise on that Christmas morning.
The post DIY: Upcycled Play Kitchen first appeared on Hip Chick Digs.

Old cabinet ready to become a play kitchen
Step 1: Find your future kitchen and prep
The cabinet we found has a low counter on it and looks like a miniature workbench. I’ve seen folks turn more challenging things like old TV cabinets, night stands, etc. into play kitchens. Get some ideas through web searches and on Pinterest. My cabinet find was so straight-forward that turning it into a kitchen was super simple.

Old cabinet ready for painting
To prep the cabinet, I do a good thorough cleaning. Once dry, I remove all the drawers and knobs to paint everything white. That gave me a good blank slate to work from, so I could decide later what color and features to add.
Step 2: Place sink area
Our cabinet was wide enough to split into two areas: stove top and washing area. I carefully drew the placement of everything in pencil on the countertop before anything was cut. That helped me plan out how it could all fit. The sink and faucet were the first things to go in, since they required cutting into the cabinet.

13/16″ drill bit for making faucet holes. I brought the faucet into the hardware store to make sure I found a perfect match!
I bought a few items to help with this step: a cheap faucet (thrift store), metal bowl (thrift store) and a 13/16″ drill bit (hardware store) that perfectly matched the holes I would need for the faucet. Altogether, those supplies were ten bucks.

View from under the cabinet of sink hole and faucet assembly.
A jigsaw would likely work best for cutting the sink hole, but I don’t have one so I improvised with a narrow hand saw. I cut a crude hole for the metal bowl/sink and spent some time sanding to get the shape just right. After placing the sink, I used a clear caulking to keep it in place. The drill bit was just perfect for a snug-fitting faucet and I used the washers it came with to tighten into place.
Step 3: Create the stovetop
This part was a lot of fun! I used cheap plastic cabinet knobs to make on/off dials for the stove. I drilled tiny holes, placed the knobs, then tighten with washers on the other end. Leave them loose enough so your little one can still turn them. In a later picture, you’ll see I painted a tiny white dot on the edges.

Pencil marking the location of all pieces. Drawer knobs used as on/off burner dials.
I made a few mistakes with creating the burners. First, paint the area BEFORE placing the knobs. I left mine loose so I could paint right under then and around them. The second mistake – I used whatever paint I had on hand, which was oil-based. Big mistake. After two days, the paint still wasn’t dry. I ended up wiping off what I could and repainting with acrylic. Acrylic has a wide array of colors and it dries in just an hour or two.

Painting the stovetop
I painted the stovetop grey and the burners black. Kind of simple colors, but I wanted the grey to mimmick the look of metal – like most stovetops.
Step 4: Transform the cabinets
This part can vary depending on what you have to work with. I’ve seen folks take out cabinet faces and add ruffled curtains. You could simply paint the cabinet faces and call it done. I choose to make an oven with a window and a refrigerator with a “glass” shelf inside, both painted grey. The last bottom cabinet I painted blue to add some color, but the two overhead cabinets I left white.

Bottom drawers become oven with window, fridge with “glass” shelf and a storage drawer for pots and pans
For the oven door, I cut a wide hole in one drawer face, about 1″ from the interior edges, so I wouldn’t compromise the drawer construction. I measured the opening, walked to my local hardware store, and they cut a piece of plexiglass to size – plus about 1/2″ on all sides. I used an all-purpose glue to adhere the plexiglass to the inside of the drawer “window”. That way you don’t see the glue from the outside and the oven door looks more realistic.
The refrigerator was an easy change. I removed a wooden shelf, took measurements and had my local hardware store cut another piece of plexiglass to size. It fit perfectly and looks just like the glass shelves we all have in our fridges. Total cost of both pieces of plexiglass was about six bucks.
Step 5: Accessorize
After all the major pieces were in place, I took a step back to evaluate my work. I felt like there was something missing, so I decided to add some little finishing touches. I used white hooks, about two bucks a package, to screw underneath the overheard cabinets. Those became the perfect place to hang cooking utensils.

Cooking utensils hanging from small white hooks under the overhead cabinets
Next, I used a big white hook to screw onto the side of the cabinet, right under the countertop. I donated one of my vintage kitchen towels to the play kitchen cause. Juniper actually uses it a lot to wash the dishes and clean up her cooking area.

Vintage kitchen towel hanging from a large, white hook under the counter
Step 6: Play!
The final play kitchen turned out just like I wanted. It’s simple, but has all the elements you need for hours of fun. The cabinet cost $10, the construction components were about $15 and the kitchen toys (pots, pans, food) were about $20. In terms of time, I probably spent less than eight hours.

The finished play kitchen. (Don’t be fooled by the cat – he did nothing to help!)
Although this was a fun project, there were times when I thought I should have just bought a play kitchen off Craigslist! It’s hard as a working parent to make time for any extra projects. But seeing how much fun Juniper is having with this kitchen has made my hard work feel worth it.

Juniper’s Christmas present
So if you come across that perfect piece of used furniture to turn into a play kitchen, don’t be intimidated! It’s an easy, fun project that can be as simple or complicated as you want it to be.I’ll never forget Juniper’s look of joyful surprise on that Christmas morning.
The post DIY: Upcycled Play Kitchen first appeared on Hip Chick Digs.
