Our remodeling to-do list is about a mile long ever since we bought our fixer-upper house this summer. With chilly temperatures outside, I’ve finally had a good excuse to stay inside and knock a few off the list. This past week: rehabbing our cosmetically-challenged fireplace.

Fireplace before – thin layer of primer and outdated gas insert (never mind the TV on top. It’s a temporary spot and we hate it there!)

Gas fireplace insert with brass detailing. The late-80’s called and they really want it back.
The brass details make the insert look extra bulky and dated. The previous folks had painted on a thin, uneven layer of primer over the bricks. All it took was some thought, paint and a few hours to get it up to snuff.

Sanding the brass detailing to prep for painting
The first step was painting the brass details to de-emphasize the old insert. I roughed up the brass areas with sand paper, then wiped them down clean. That increases the ability of paint to adhere to a smooth surface.

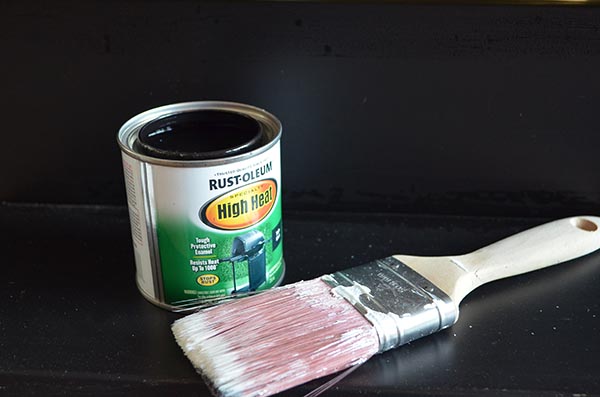
High-temperature black paint. Available in both can and spray paint form.
Next, I used high temperature paint on the sanded brass areas – the same stuff you use to paint barbecues. Some fireplace inserts will easily pop off, so you can paint them outside in the fresh air. If you go that route, use the high temperature spray paint for a nice, even coat. In my case, I attempted to remove the insert, but the insert won. So instead, I used the high temperature paint that comes in a small can instead to paint in place.

Brass detailing after the first coat of paint
All the windows were open and overhead fans were blazing as I carefully painted the sticky, oil-based paint on. Let it dry well between coats. It took me three coats of paint to completely, evenly cover all signs of brass. Be prepared to throw out your paint brush, since it will be an oil-based paint, sticky mess.

Gas insert painted!
The next step was priming the brick hearth. An uneven surface, like brick, will suck up a surprising amount of paint to get a nice, even coat. Primer is cheaper than my fancy Yolo paint, so that nice thick layer of primer made sure the surface was fully prepped for the final paint to slide on.

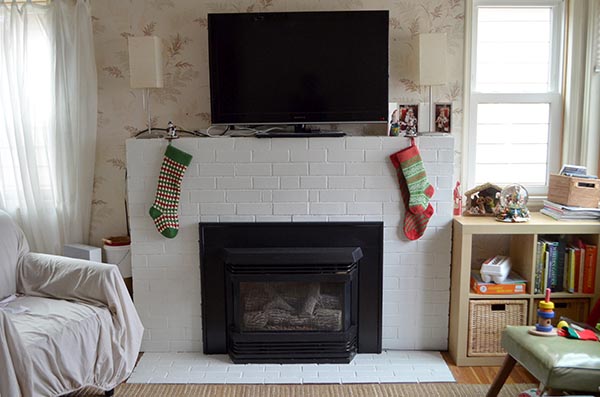
Gas insert and brick hearth painted. Now to get rid of that fern print, textured wallpaper…

Just in time for holiday cheer
We are incredibly pleased with the final product! We already had the primer and Yolo paint from different projects, so I only spent about $6 for the small can of high temperature black paint. The fireplace is on almost every evening as the wind howls and the rain pours outside.
The post DIY Fireplace Redo first appeared on Hip Chick Digs.

Fireplace before – thin layer of primer and outdated gas insert (never mind the TV on top. It’s a temporary spot and we hate it there!)
A fireplace was on my “must have” list for our new homestead. I love making this the focal point of our home – a place to curl up together and get cozy. Our new house has an outdated gas fireplace, but a fireplace none the less.

Gas fireplace insert with brass detailing. The late-80’s called and they really want it back.
The brass details make the insert look extra bulky and dated. The previous folks had painted on a thin, uneven layer of primer over the bricks. All it took was some thought, paint and a few hours to get it up to snuff.

Sanding the brass detailing to prep for painting
The first step was painting the brass details to de-emphasize the old insert. I roughed up the brass areas with sand paper, then wiped them down clean. That increases the ability of paint to adhere to a smooth surface.

High-temperature black paint. Available in both can and spray paint form.
Next, I used high temperature paint on the sanded brass areas – the same stuff you use to paint barbecues. Some fireplace inserts will easily pop off, so you can paint them outside in the fresh air. If you go that route, use the high temperature spray paint for a nice, even coat. In my case, I attempted to remove the insert, but the insert won. So instead, I used the high temperature paint that comes in a small can instead to paint in place.

Brass detailing after the first coat of paint
All the windows were open and overhead fans were blazing as I carefully painted the sticky, oil-based paint on. Let it dry well between coats. It took me three coats of paint to completely, evenly cover all signs of brass. Be prepared to throw out your paint brush, since it will be an oil-based paint, sticky mess.

Gas insert painted!
The next step was priming the brick hearth. An uneven surface, like brick, will suck up a surprising amount of paint to get a nice, even coat. Primer is cheaper than my fancy Yolo paint, so that nice thick layer of primer made sure the surface was fully prepped for the final paint to slide on.

Gas insert and brick hearth painted. Now to get rid of that fern print, textured wallpaper…
For the final paint layer, I used the same white that we are using on all of our trim in the house (Imagine .02). It went on smooth, thanks to the thorough primer job.

Just in time for holiday cheer
We are incredibly pleased with the final product! We already had the primer and Yolo paint from different projects, so I only spent about $6 for the small can of high temperature black paint. The fireplace is on almost every evening as the wind howls and the rain pours outside.
The post DIY Fireplace Redo first appeared on Hip Chick Digs.
